Sunday, March 31, 2013

The Archmount

Over a year ago, My good friend Steve from The Scooter Scoop, told me about his idea for a unique, simple, pocket-able iPad tripod mount, and since we're both VERY interested in product design, we got together to see if we could make something of his idea.

The Archmount was born


So I set to work fleshing-out the design using Solidworks.
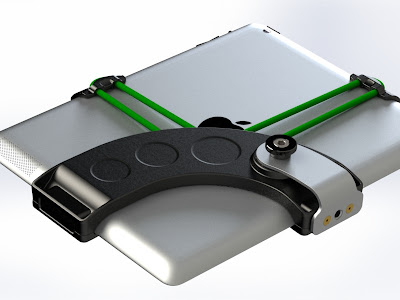
Initially I concentrated only only producing a "Proof of Concept" design, one that had all the functional geometry and basic constraints we'd be using. Here is that first design in CAD and a 3D printed model:


About this time, we became friends with Aaron, A Professor at UTA that became our defacto project manager and all-around helpful guy.

Well, the proof-of-concept model worked great, but we still had a lot to figure out, mainly how to manufacture this product in quantity? Good old fashioned injection-molding seemed to be the way since few would be willing to buy a $300 3D printed product, So the iterative process started, RevA, RevB, RevC..
Of course, prototyping and testing at each level and learning more about injection mold design than I ever thought possible, ultimately settling on a simple-to-mold design that had no "side-actions" or complicated geometry that tends to increase the cost of mold tooling. 
We really "went to school" on the process of bringing a product to the market, The Archmount pushed our skills further and further each step, CAD, Marketing, Project Management, Sourcing, Cost Analysis, you name it, we pushed ourselves.
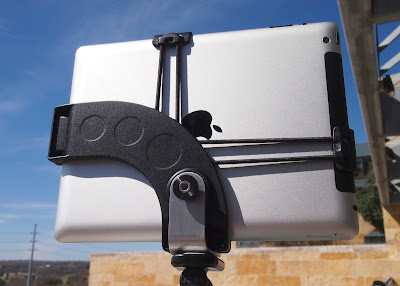
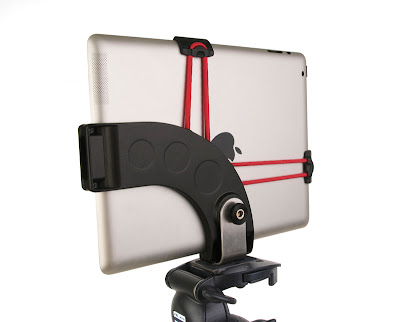
Here is the final result:


We really felt like we had a great product, but reality set in.
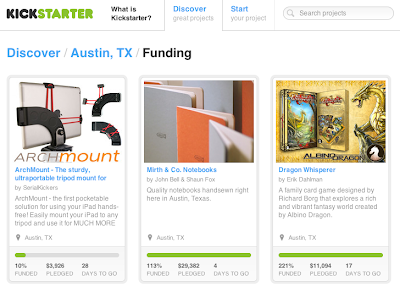
The reality is that contracting for injection molding is serious $$, not to mention that the market for iPad mounts is already very crowded. We certainly didn't have the tens of thousands of dollars needed to produce and market the Archmount and getting a loan for that is next to impossible so we turned to Kickstarter.


Turns out we didn't reach our funding goal, but I don't think that's necessarily a bad thing, It showed us this product would sell in lower numbers than we originally thought, at least with our marketing budget of essentially zip. Also, we needed a pretty large sum of money to tool-up, produce, assemble, package and ship about 1000 units and we had almost no "bootstrap" money to supplement that.
In hind-sight I think we could have produced and sold a couple thousand of these if we had tried a different strategy and were more timely in our campaign but the clock has pretty much run out on this on.
All-in all, working on this project was a real joy and we got so much out of it despite not going into production, we honed our skills immensely, pushed ourselves to learn skills that we'd otherwise wouldn't have and met so many helpful and encouraging people along the way.
I'd call it a "Partial Success".


Damascus Steel Bracelet

I was recently asked if I was willing to make a graduation gift for some close friends as a gift for their nephew. Specifically a monogrammed bracelet. I had free reign on design but a specific budget.

No Problem!


I wound up using two styles of Stainless Damascus Steel, 14ga 18kt gold wire and gold plated machine screws. I think it was one of the most interesting jobs I've done, quite a test of techniques!


Here is what I started with, Stainless Damascus Steel drops given to me from my super-talented friend Chris from Speed Shop Design:


I didn't take many pictures while making this piece unfortunately, but it would've just been images of me scratching my head 90% of the time, trying to figure out how to do what I wanted to do...
Eventually I settled on a combination of machining and cold-working the three separate parts before engraving the letters, setting the gold, followed by an acid etching and gentle localized heating to give it some color and contrast. I wouldn't mind making one for myself now!


iPhone4 Case Experiment

Having bought an iPhone4 some time ago, I've considered buying a case many time, but I never was very happy with what was out there. So I set about working on one that expressed my function and aesthetic.


I really like the "plate and screws" approach, something that emphasizes materials used and high-lights fancy fasteners, It's just my preference!
The design essentially uses a top and bottom plate, each 1/16" thick with an inner lining of 1/32" epdm rubber, held together with 4 corner pieces made from 3D printed material, all parts are held together with very small, gold-plated 1-64 torx machine screws.
I experimented with different materials for the plates, Aluminum, Brass, Copper-plated FR4, G-10 and even Carbon Fiber plate.


Cutting the plates on the CNC super-easy.

In the end though, I abandoned the use of these cases in favor of a naked iPhone. 
Seems just about any material that covers the iPhone effects the signal strength and renders the iPhone damn near unusable. It's an uphill battle with the iPhone just starting off too, Heck, just holding it wrong can kill an already spotty signal. The only materials that could be used seem to be non-metals and furthermore, nothing with any kind of carbon or metal additive. G-10 and Micarta were the only materials I tested that might be OK..but still cut the signal, just not as drastically as metals. 
It was a shame too, since my favorite was the carbon fiber plate and gold screws with clear 3D printed corners and buttons.. Looked like super-high-end Gucci stuff! but almost no signal! Ugh.
Of course Apple's case design recommendations spell this out but I'd seen some solid metal cases being sold(EXOVault)  so I took a chance.
Interestingly, EXOVault seems to have gone from designing bricks of metal type cases to designs that use only a very minimal amount of metal.. Also non-carbon composites and wood.. So maybe I'll give it another shot soon using what I've learned.


Engagement Ring Prototyping!

So a little over a year ago, my good friend Chris from Speed Shop Design asked me to prototype an engagement ring set he'd designed for his soon-to-be-wife. What an Honor!

I was put to work machining the set from 2024 aluminum to check for correct size, comfort, aesthetics and also as a practice piece for gem-setting. This was a very important step since the real ring set was to be cast from platinum.

After looking at the ring design for a while, I choose a simple machining method, the bridge...


In essence, a series of small "bridges" that connect the part geometry to the out portion of the material, then after the machining is complete, the part is removed from the block using a small coping saw.
Since both top and bottom of the ring design is symmetric, I only had to write one program and use it for both sides.
The set-up:

The first side:

The second side:

After finishing the machining, I sent the raw parts to Chris for finishing and practice setting using a CZ, turns out his design was spot-on.


Everyone was happy with the design and fit so off it went to be investment cast in platinum and hand set with a diamond.
Operation Engagement Ring: A Complete Success!